
REVIEW · ANNAPURNA BASE CAMP TREKS
7 Days Annapurna Base Camp Trek from Pokhara
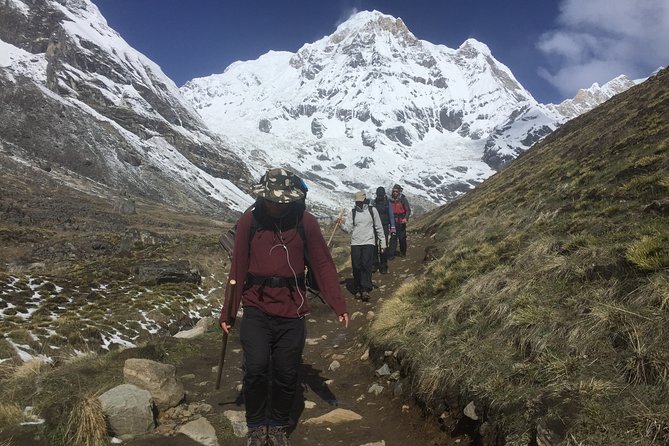
A good trek has a rhythm. This one pairs classic Gurung villages with high-mountain views, from Naya Pul up to Annapurna Base Camp and back down in a steady loop.
I especially liked how the route builds momentum day by day, starting with an easy launch from Pokhara and moving through places like Ghandruk and Chhomrong before you work up to Annapurna Sanctuary. Another standout is the human support, the kind you notice when someone quietly fixes small problems, like your guide and team doing for folks such as Saroj and Krishna, with helpers who keep the mood up.
One consideration: the itinerary asks for consistent hiking days, including several 6 to 7 hour stretches, and you’ll be at high altitude around 4,130 to 4,310 meters. If your fitness is not solid, you’ll feel it.
In This Review
- Key highlights worth your attention
- Why This Annapurna Base Camp Trek Starts in Pokhara
- Price and What You Actually Get for $287.92
- Fitness and Altitude: The Real Game on Annapurna
- Day 1: Naya Pul to Ghandruk, where the trek starts feeling real
- Day 2: Chhomrong, a tough-feeling day that pays you back
- Day 3: Annapurna Sanctuary to Himalaya, the mountain zone changes
- Day 4: Machhapuchhare Base Camp to Annapurna Base Camp, the big day split in two
- Day 5: Descend to Bamboo, regain balance after the peak
- Day 6: Ghandruk to hot springs, a reward that actually helps
- Day 7: Phedi Khola down to Pokhara Lakeside, finish with comfort
- Guides, pacing, and why the team matters more than you think
- What to pack and how to handle the “meals not included” reality
- Should you book this Annapurna Base Camp trek?
Key highlights worth your attention
- Private setup with your group only, plus hotel pickup and drop off from Pokhara
- English speaking trekking guide, including guides named Saroj and Krishna in past trips
- Permits handled, with the trekking permit and TIMS card included
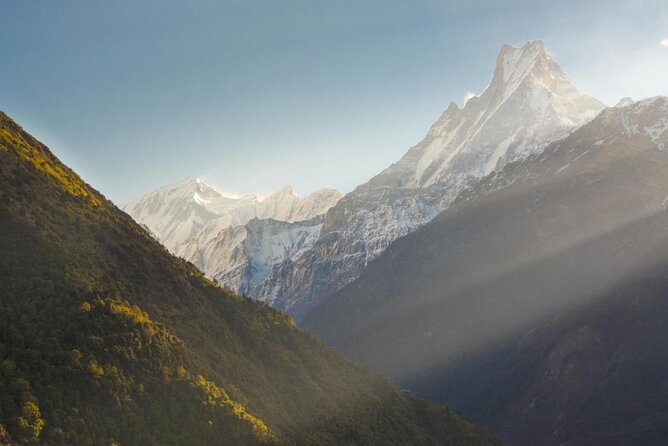
- Real route variety, villages, forests, and bridge country mixed into the trek
- Guest house accommodation every night, with a planned pace and nightly rest stops
- Hot spring stop on the way back, a nice physical reset after altitude days
Other approaches to the Sanctuary gate
Why This Annapurna Base Camp Trek Starts in Pokhara
Pokhara is a smart launch point for Annapurna Base Camp. You’re not scrambling around town trying to find your bearings, you’re getting picked up, driven out, and given a clear first step. That matters because the first day sets the tone. When you start with good logistics, you can focus on walking, breath, and the small joys like tea stops and village scenery.
This trek is also popular for a reason: it offers a blend of Nepal that feels practical, not just scenic. You move through countryside villages associated with Gurung communities, you pass through forest sections, and you’ll likely cross suspension bridge country along the route. The result is a journey that feels like travel through places, not only a climb toward one summit goal.
You should also know this route is guided and planned in a way that makes sense for most people. It’s not a lightning-fast challenge designed for experienced trekkers. The days are broken into workable segments, with overnight stops in guest houses so you’re not improvising at every step.
Price and What You Actually Get for $287.92
At $287.92 per person, this is positioned as a value-focused trekking package. The key is what you get covered versus what you carry yourself.
Included in the price:
- Hotel pickup and drop off
- Round trip transfer by private car as per the itinerary
- Trekking permit and TIMS card
- English speaking trekking guide
- Guest house accommodation
- Private trip (your group only)
- Mobile ticket, plus pickup support
Not included:
- All meals
- Personal expenses
- Rescue costs in an emergency
- Gratitude, optional
For many people, the biggest value is the paperwork plus guide plus lodging. Permits and TIMS can be a headache when you’re short on time, and a good guide is not just about directions. A guide helps you pace yourself, decide when to push, when to slow down, and how to manage the mental grind of altitude days.
The private car transfers also reduce friction. You’re not trying to negotiate transport after a long trek. Instead, you’re taken back toward Pokhara, then transferred to your hotel. That comfort is easy to underestimate, until you’ve done a trek where transport is the last thing you want to think about.
Fitness and Altitude: The Real Game on Annapurna
This is listed for people with a strong physical fitness level, and I agree with that framing. The itinerary includes multiple days around 4 to 7 hours of trekking, with Day 1 at about 6 hours, Day 2 around 6 hours, Day 3 around 7 hours, and Day 5 another 6 hour walk. That’s a lot of steady time on your feet even before you consider altitude.
Altitude is the other reality check. Annapurna Base Camp sits roughly in the 4,130 to 4,310 meter range based on the altitude figures mentioned in past trek experiences. That means you’re likely to notice breathing changes, slower walking rhythm, and that slightly off feeling that comes with thinner air. The guide’s job is not magic. But good pacing and practical decision-making can make a big difference.
Practical advice for you:
- Train for long walking days before you go
- Plan for slower progress on altitude segments
- Bring snacks you like, since meals are not included
- Expect you will feel better if you stop when the guide suggests and eat and drink on schedule
If you can handle day hikes that last most of the day, you’re starting from a good place. If you’re more casual, you can still do it, but you’ll need to be very honest about your fitness and altitude tolerance.
Day 1: Naya Pul to Ghandruk, where the trek starts feeling real
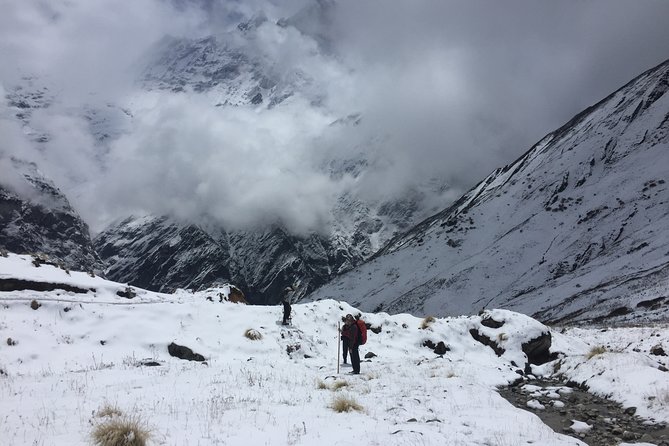
The first step is the drive from Pokhara to Naya Pul, about 1 hour 30 minutes. This is an advantage because you get time to settle, organize your daypack, and start walking without the stress of figuring out transport mid-morning.
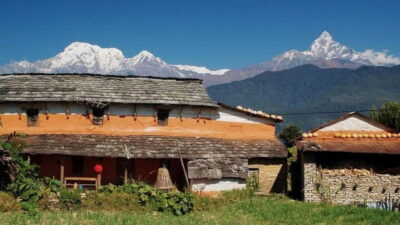
From Naya Pul, you trek to Ghandruk for about 6 hours. Ghandruk is one of those classic Annapurna village stops. It helps that you’re not thrown into high altitude immediately. Instead, you build legs, get a sense of the terrain, and begin meeting the mountain-country pace: climb, rest, tea, repeat.
What I like about this day is that it gives you both motion and context. You’re moving through the countryside while also seeing how village life is structured around trekking routes. By the time you reach Ghandruk, you’re ready for a guest house night, not still full of travel fatigue.
A possible drawback: after the drive, 6 hours still counts as a real start. If you arrive tired or undertrained, this day can feel longer than it looks on paper. Coming into it rested helps a lot.
Other lodge to lodge routes near Pokhara
Day 2: Chhomrong, a tough-feeling day that pays you back
Day 2 treks to Chhomrong, again about 6 hours. This is where the Annapurna trail starts to feel more serious. Chhomrong is known for its dramatic views and the sense that you’re moving into the heart of the mountain zone.
The route here typically means more sustained uphill and downhill rhythm. You’ll likely adjust your pace quickly, and that’s normal. The key is to keep your effort steady rather than trying to power-walk through every segment.
I like Day 2 because it usually sets your expectations for the days ahead. If you can find a comfortable rhythm here, you’re in a better position to handle the longer and higher segments on subsequent days. Also, Chhomrong is often a place where the scenery starts doing more than entertaining. It starts guiding you, almost like a milestone you can aim for.
One consideration for you: with a 6 hour day, you should protect your energy in the afternoon. If you wait until you feel exhausted to drink water or eat, the next morning can feel harder than it needs to.
Day 3: Annapurna Sanctuary to Himalaya, the mountain zone changes
Day 3 hikes to Annapurna Sanctuary, then continues to a stop called Himalaya. The trekking time is listed around 7 hours, and that is the long one of the middle days.
This stage is special because the environment often starts shifting. You’re leaving more village-and-forest rhythm behind and moving deeper into terrain that feels more alpine. Even without focusing on a single peak view, the feel of the air and the shape of the trail communicates altitude changes.
7 hours can be mentally taxing, but it’s also a day that helps you learn the pacing you’ll need later. You’re practicing how to keep going while still respecting your body. A good guide helps here, and in past trips people have praised guide support from the team, including a named operator Saroj and guides like Krishna.
Possible drawback: it’s a longer day, so it can be harder to recover if you sleep poorly the night before. If you’re sensitive to altitude or you don’t handle long walking well, you might want to slow down earlier in the day instead of trying to “catch up” later.
Day 4: Machhapuchhare Base Camp to Annapurna Base Camp, the big day split in two
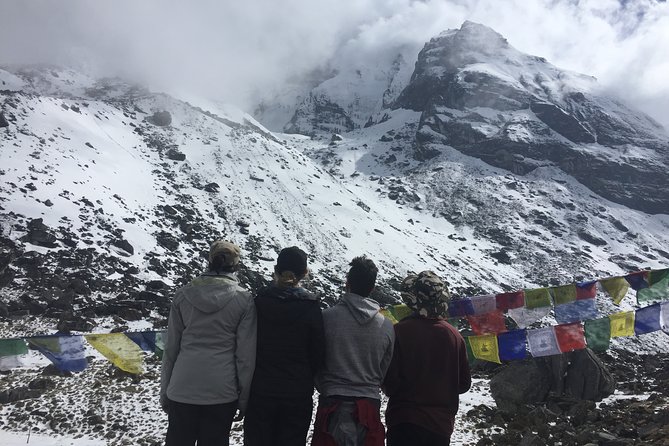
Day 4 is laid out as two clear targets. First you trek to Machhapuchhre Base Camp, then you continue on to Annapurna Base Camp. The day is listed as about 5 hours to Machhapuchhre Base Camp, then about 2 hours to reach Annapurna Base Camp.
This split format is smart. Machhapuchhre Base Camp acts like a checkpoint day. You’re not immediately sprinting toward the final line, you’re building toward it, getting a sense of what the surrounding terrain looks like, and mentally adjusting to the high-zone feeling.
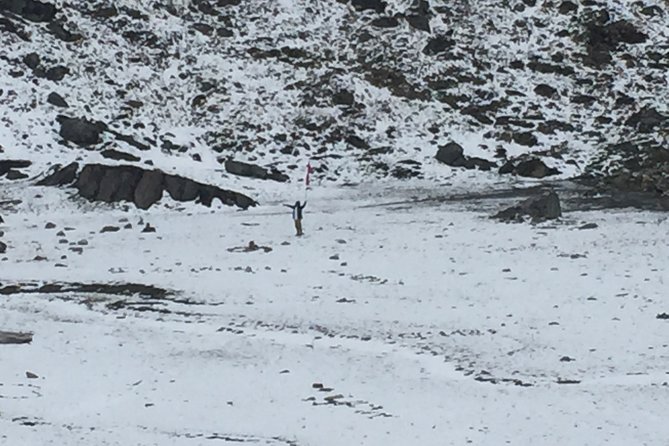
Then comes Annapurna Base Camp. This is the goal most people picture when they book. Base Camp is about the scale and the atmosphere, the sense of standing inside a mountain amphitheater. Past experiences describe it around 4,130 to 4,310 meters, so you can expect you’ll feel it.
What I like most about this structure for you: it’s easier to manage effort when you have two milestones. It also means you don’t only judge the day by the final arrival. You earn progress along the way.
One consideration: even though the itinerary lists 2 hours after Machhapuchhre Base Camp, that “short” segment still takes place at altitude. You might need more stops than expected. Bring patience, and let the guide set the pace.
Day 5: Descend to Bamboo, regain balance after the peak
After the base camp day, Day 5 brings you down to Bamboo, trekking for about 6 hours. The plan calls it a descent, but it’s still walking time, often with terrain that requires attention. Descents can be rough on knees and can drain energy if you go too fast.
This day is valuable because it helps your body move through recovery mode. Instead of staying stuck at the emotional high of the base camp day, you shift back into a more sustainable hiking rhythm. It’s also a chance to refocus on hydration and simple food.
I like Day 5 because it’s the practical bridge between “peak experiences” and “getting home.” It’s where you start feeling more like you’re traveling again, not only pushing forward.
A possible drawback: descents can tempt you to rush. Your legs may feel okay at first, then you realize you’re paying for speed on the next day. Aim for steady, controlled steps.
Day 6: Ghandruk to hot springs, a reward that actually helps
On Day 6, you trek from the route down toward Ghandruk and then to hot springs. Total trekking time is about 4 hours, and this is one of the nicest morale boosters on the itinerary.
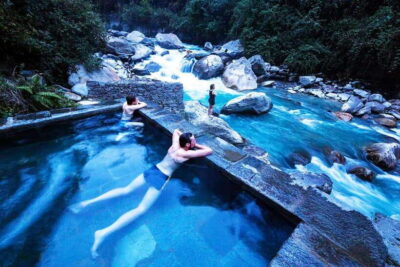
Hot springs are not just a fun add-on. They can be a practical way to soothe tired legs after several altitude days and a long base camp push. Even if the water doesn’t erase soreness, it gives you a reset and helps you enjoy the evening more.
What makes this day work is the shorter trekking time compared with earlier days. You get a chance to move without feeling like you’re constantly chasing a deadline. That matters when fatigue starts stacking up.
Consideration: hot spring time depends on how the day’s schedule lands. If you’re prone to getting chilled easily after sweating, plan your clothing and keep warm between walking and soaking.
Day 7: Phedi Khola down to Pokhara Lakeside, finish with comfort
Day 7 is the final descent from Phedi Khola to Pokhara Lakeside, with about 4 hours of trekking and then a short drive of about 45 minutes back to your hotel.
This is a gentle ending compared with the earlier days. You’re not chasing big altitude gains, you’re winding down. Trek-to-drive transitions are a small detail that can make a trip feel organized, and this one includes that private transfer back into Pokhara.
I like the Lakeside finish because it gives you a real closure. You’re not simply deposited somewhere and sent on your own. You’re returned to your hotel area, with time to eat a proper meal and reflect on the week while your legs still remember the trail.
A possible drawback: if you’re hoping for extra time in Pokhara right away, build in some buffer. After a long trek, you might feel like doing very little, even if you want to pack in sightseeing.
Guides, pacing, and why the team matters more than you think
In Annapurna country, the guide role is not only navigation. It’s pacing, risk awareness, and keeping the group moving with calm confidence. Past experiences praised guides and team members, including support tied to Saroj, and guide help from people like Krishna. There were also mentions of fun breaks on the way up and down, which sounds small, but it helps more than you expect when the trail gets repetitive.
Also, because this is set up as a private trip for your group, you’re less likely to feel like you’re stuck in someone else’s speed. That can be a big quality-of-life difference, especially on longer days.
One more practical point: since meals are not included, the guide and team’s organization around timings is extra important. Even if food is bought along the way, you benefit when you know where you’re headed and what your options are at each stop.
What to pack and how to handle the “meals not included” reality
Because meals are not included, you should treat the trek like a pay-as-you-go food plan. That doesn’t mean it’s expensive, but it does mean you need a strategy.
I recommend you plan for:
- A small breakfast routine that works for you
- Snacks that keep your energy steady
- Drinks and electrolytes if you tend to get headaches
- Cash for guest house meals and hot drinks along the trail
You’ll also appreciate layers. Early mornings can feel sharp, while midday hiking can warm you up. Pack light but think in layers, so you can adjust without stopping for long.
If you’re sensitive to altitude, you might also carry personal items that help you sleep better. Not because the route is difficult, but because guest house nights are part of the experience and comfort affects how you recover.
Should you book this Annapurna Base Camp trek?
Yes, you should book this trek if you want a structured, guided ABC experience with permits handled, guest house stays included, and a private Pokhara transport plan that keeps the logistics simple. The hot springs stop, plus the village route through places like Ghandruk and Chhomrong, makes it more than a straight shot to a mountain photo.
I would hesitate if your fitness is not strong or you’re not comfortable with daily 4 to 7 hour hiking segments at altitude. This trek can feel like a workout, not just a scenic walk.
If you’re the kind of person who likes clear stages, a supportive guide team, and an honest pace toward Annapurna Base Camp, this is a solid choice.
Lodge to Lodge Around Pokhara
The Rest of Our Pokhara Write Ups


Through the Sanctuary Gate
Everything else we have reviewed around Pokhara
- Pokhara: Cable Car Tour – Bird Eye View of Mountain & Lake
★ 4.4 · 3 reviews - Jomsom Muktinath Tour by 4WD SUV 2 Days
★ 5.0 · 3 reviews - Ghorepani Poonhill Private Trek – 2 nights / 3 days
★ 4.5 · 3 reviews - Pokhara: 30-Minute Paragliding Adventure with pick up/drop off
★ 4.5 · 3 reviews - Pokhara: 7-Day Annapurna Base Camp Trek via Ghandruk
★ 4.3 · 3 reviews - Pokhara Group Joining Sarangkot Sunrise Himalayas Tour
★ 5.0 · 3 reviews
Annapurna Base Camp Treks worth a second look.
 ★ 5.0Annapurna base camp trek 5 DaysFrom $699252 reviews
 ★ 5.0Annapurna Base Camp TrekFrom $935111 reviews
 ★ 5.0Kathmandu to Annapurna Base Camp (ABC) 5-Day TrekFrom $99102 reviews
 ★ 5.0Annapurna Base Camp Trek 12 DaysFrom $80085 reviews
★ 5.0Annapurna Base Camp TrekFrom $92580 reviews
 ★ 4.95-Day Annapurna Base Camp (ABC) TrekFrom $9672 reviews
★ 5.0Annapurna Base Camp TrekFrom $69959 reviews
 ★ 5.011-Day Hike Tour to Annapurna Base Camp Bliss in KathmanduFrom $1,30052 reviews
Lists this tour sits in